Showing posts with label ROOT. Show all posts
Showing posts with label ROOT. Show all posts
Tuesday, December 27, 2016
How To Root Starmobile Quest Using iRoot
This tutorial will guide you the steps that you should follow on How To Root Starmobile Quest Using iRoot.
Rooting is the process of allowing users of smartphones, tablets and other devices running the Android mobile operating system to attain privileged control (known as "root access") within Android's sub-system.
To know more why we want to root our Android Smartphone?Go Here
What is iRoot?
iRoot, Formerly Vroot, is a free one click Android root tool designed by XINYI Network. Just click one button, you can root your Android device immediately!
iRoot is an easy-to-use tool. Enable the USB debugging mode, and connect your phone to the computer, then click the button "root" and now what you have to do is just waiting for the root result. Forget the complex and troublesome tutorials, everyone can control it easily.
iRoot's goal is providing the excellent and simplest experience for all android users. The newest version of iRoot has supported more than 8000 Android devices. It is more effective, easier and faster than you can imagine.
PROCEDURE :
Step 1 : Download this file : iRoot
Step 2 : Extract the file and run iRoot
Step 3 : Connect your phone to your pc or laptop using your usb cable ( Make sure your Quest is detected )
NOTE: if your phone is not detected download and install Universal ADB Drivers
HERE IS THE LINK : http://adbdriver.com/downloads/
Step 4 : Once your phone is detected click ROOT . wait the process until the phone is rebooted
Step 5 : When the reboot is done check your APP Drawer , see if there is Kinguser app installed .
Step 6 : When you already have Kinguser apps, Go to Play Store search and install Root Checker and Check if you have rooted.like this shown in the image.

That's It Very Easy!
Something Wrong in my Post?Feel Free to comment Below!
Don't Forget to Like us on Facebook or Subscribe to us via E-mail
Posted by
komon

Saturday, December 17, 2016
How to Root Samsung Galaxy Note 3 (SM-N9005) Running on Android 4.4.2 KitKat
This tutorial will guide you the steps that you should follow to Root Samsung Galaxy Note 3 (SM-N9005) Running on Android 4.4.2 KitKat .Just follow step by steps on How to Root Samsung Galaxy Note 3 (SM-N9005) Running on Android 4.4.2 KitKat.
Guidelines and Requirements:
This Android Rooting guide is only meant for Samsung Galaxy Note 3, therefore do not try to apply it on another variant or see your device brick.Rooting your phone will void its warranty.
Enable USB Debugging from Settings and Developers Options.
Before going for the root process check that you’ve got good enough battery charge
Last but not the least, Proceed at your own risk.
How to Root Samsung Galaxy Note 3 (SM-N9005) Running on Android 4.2.2 KitKat XXUENA6 Using CF-Root
Step 1: First you need to download the CF-Root package for Galaxy Note 3.
Step 2: Unzip the downloaded file on your desktop, You’ll get the tar.md5 file and Odin.
Step 3: Now Reboot your phone into Download Mode by Pressing and Holding the Volume Down + Home + Powerbuttons at the same time till you see a warning message on your screen. You’ll be asked to hit the Volume Up to continue into download mode.
Step 4: Once in the Download Mode, Run the Odin3-v1.85.exe and Connect your Galaxy Note 3 to PC via the USB Cable.
Step 5: At this point make sure that Odin has recognized your device and check that theID:COM port is yellow or blue. You should also notice Added!! in the message section, which confirms that it has successfully made connection with Odin.
Step 6: Finally, Hit the PDA button and browse the CF-Auto-Root-hlte-hltexx-smn9005.tar.md5, file and Click on the Start button to begin the rooting process.
Step 7: The process will complete in a few seconds and once it is done, Odin will notify you via the PASS!! message and during this your device will automatically reboots.

Step 8: Congrats!! Your Galaxy Note 3 has been successfully Rooted. Check that SuperSU has been installed and to Verify Root Access, Open Google Play Store and search for ‘Root Checker‘ App. Install and Run it.

SOURCE:Android central
That's It Very Easy!
Something Wrong in my Post?Feel Free to comment Below!
Don't Forget to Like us on Facebook or Subscribe to us via E-mail
Posted by
komon
Friday, December 2, 2016
How To Root Asus Zenfone 5
In This Tutorial We Share with you How To Root Asus Zenfone 5.Root your device to gain more control on your devices.First thing first,Let's take a look the specifications of this phone.
 |
| Asus Zenfone 5 |
Asus Zenfone 5 Specifications:
1.6GHz Dual Core Intel Atom Z2560 Processor
Android 4.3 Jelly Bean OS with Kitkat Update
Zen UI User Interface
5.0-Inch HD IPS Display (720 x 1280 Pixels, 294 PPI)
Corning Gorilla Glass 3 Scratch Resistance
PowerVR SGX544MP2 GPU
8.0 Megapixel Autofocus Main Camera with LED Flash
2.0 Megapixel Front Camera
2GB of RAM
8GB Internal Storage
Expandable up to 64GB via MicroSD
Dual SIM (Micro + Micro)
3G HSPA+, 2G EDGE and GPRS Networks
Wi-Fi and Wi-Fi Hotspot
Bluetooth 4.0 with A2DP
GPS with GLONASS and A-GPS
FM Radio
Micro USB
3.5mm Audio Jack
Accelerometer
Gyro
Proximity Sensor
E-Compass
148.2 x 72.8 x 10.3 mm @ 145 grams
2,110mAh Li-Po Battery (Non-removable)
Disclaimer:Do it at your own risk.We are not responsible anythings happen in your phone!
Download:
Zenfone Root APK
Credits to the owner of this root file
2.Once the Zenfone Root APK is already in your SD Card.Go to Menu>Setting>Security on your phone and enable unknown sources selection.
3.Locate the root file in your File Manager and Tap it to install.
4.After Installing,open the newly installed app.Select SuperSU(BY CHAINFIRE)then hit OK i know,Please root!
5.Wait for the app to successfully root your device.Once done,download root checker on Play Store to confirm if the rooting is completely exploited.
That's It Very Easy!
Something Wrong in my Post?Feel Free to comment Below!
Don't Forget to Like us on Facebook or Subscribe to us via E-mail
Android 4.3 Jelly Bean OS with Kitkat Update
Zen UI User Interface
5.0-Inch HD IPS Display (720 x 1280 Pixels, 294 PPI)
Corning Gorilla Glass 3 Scratch Resistance
PowerVR SGX544MP2 GPU
8.0 Megapixel Autofocus Main Camera with LED Flash
2.0 Megapixel Front Camera
2GB of RAM
8GB Internal Storage
Expandable up to 64GB via MicroSD
Dual SIM (Micro + Micro)
3G HSPA+, 2G EDGE and GPRS Networks
Wi-Fi and Wi-Fi Hotspot
Bluetooth 4.0 with A2DP
GPS with GLONASS and A-GPS
FM Radio
Micro USB
3.5mm Audio Jack
Accelerometer
Gyro
Proximity Sensor
E-Compass
148.2 x 72.8 x 10.3 mm @ 145 grams
2,110mAh Li-Po Battery (Non-removable)
Disclaimer:Do it at your own risk.We are not responsible anythings happen in your phone!
Download:
Zenfone Root APK
Credits to the owner of this root file
How To Root Asus Zenfone 5
1.Download the Zenfone Root APK from a PC or Laptop and put it to your phone's sd card.(you need an USB Cable to connnect your phone to your PC).2.Once the Zenfone Root APK is already in your SD Card.Go to Menu>Setting>Security on your phone and enable unknown sources selection.
3.Locate the root file in your File Manager and Tap it to install.
4.After Installing,open the newly installed app.Select SuperSU(BY CHAINFIRE)then hit OK i know,Please root!
5.Wait for the app to successfully root your device.Once done,download root checker on Play Store to confirm if the rooting is completely exploited.
That's It Very Easy!
Something Wrong in my Post?Feel Free to comment Below!
Don't Forget to Like us on Facebook or Subscribe to us via E-mail
Posted by
komon
Tuesday, November 8, 2016
How To Root Kingcom Android 401 with Back-up PAC Firmware That can be use for Flashing
 |
| Kingcom Android 401 |
1GHz Spreadtrum 6820 platform
3.5' HVGA (320×480)
124.5*66*10.5mm
LCD 4.0- HD
Android 2.3.5
Dual Sim
Camera Front 0.3Mega, back 2Mega,with flash light
How To Root Kingcom Android 401
Step by step Android Rooting guideDownload & install vRoot latest version on a windows PC.
Have a full backup of your device.
Switch on USB debugging mode on your Android device.
Have updated USB drivers and working properly.
Connect your device to the PC via USB cable.
Stay until vRoot detect your device.
Click ROOT button and relax till vRoot complete the process it self.
Benefits of Rooting your Android device using vRoot
Get Latest Android Updates as you want.
Install custom ROMs on your device.
Custom Kernel flashing possibility.
Unlimited Customization (/r/xposed).
Remove pre installed unwanted stuff.
Unlimited backup on cloud storages.
Prevent Ads.
Enhance device speed and battery life througg customization.
Automate Anything (/r/tasker).
Free Wi-Fi Hotspot availability.
Here's the Video:
Here's The Back-Up Pac Firmware:
Kingcom Android 401 Firmware
Password:
That's It Very Easy!
Something Wrong in my Post?Feel Free to comment Below!
Don't Forget to Like us on Facebook or Subscribe to us via E-mail
Posted by
komon
Thursday, October 6, 2016
How To Hard Reset ZH&K Pac25 And How To Root Using Vroot
Hello Mates!I want to share now How To Hard Reset ZH&K Pac25 And How To Root Using Vroot?
In this guide i will show How To Hard Reset ZH&K Pac25 And How To Root Using Vroot,Perform a hard reset using hardware keys if you forgot Any Phone Password and you cannot navigate to setting to manually reset it.By doing this,keep in mind that all data save in your phone will completely delete.Before we do that,Let's make sure your battery have already charge atleast 60 percent.
How To Hard Reset ZH&K Pac25
1.Turn-Off Phone2.Hold and Press Volume up and Power Button
3.Select Recovery using volume up and accept it by pressing Volume Down

4.Click Power button twice to go to Android System Recovery
5.Use Volume Down to Select wipe data/factory reset,Volume to accept

6.Select Yes-delete all user data,again click volume up

7.After Format,Reboot System

8.Wait Until Powered on,And you can now use phone back to normal.


How To Root Using Vroot
Step by step Android Rooting guideDownload & install vRoot latest version on a windows PC.
Have a full backup of your device.
Switch on USB debugging mode on your Android device.
Have updated USB drivers and working properly.
Connect your device to the PC via USB cable.
Stay until vRoot detect your device.
Click ROOT button and relax till vRoot complete the process it self.
Here's The Video
Posted by
komon
Sunday, October 2, 2016
[Download Link] Root Files Samsung Tab,S3,S4,S5 And Note 3 Running on Android 4.4.2
[Download Link] Root Files Samsung Tab,S3,S4,S5 And Note 3 Running on Android 4.4.2

Samsung Galaxy Tab 3 GT-P510
Samsung Galaxy S4 GT-I9508
Samsung Galaxy S4 TD-LTE GT I9507
Samsung Galaxy Mega GT-I9205
Galaxy Tab 3 GT-P5220
Samsung Galaxy S3 GT-I9301I
Samsung Galaxy S4 LTE-A GT-I9506
SC-04E
SM-G850FQ
SM-G850M
SM-G850F
SM-T335K-4.4.2
SHV-E470S
SM-G800F
SM-G750F
SC-04F
I9195L
GT-I9301Q
GT-I9502
SM-G386T
SM-G901
SM-T805Y
SM-T805W
SM-T805M
SM-T805C
SM-T805
SM-T800
SM-T705Y
SM-T705M
SM-T705C
SM-T705
SM-T700
SM-T337T
SM-N9008V
SM-G900MD
SM-G900FD
SM-G860P
SM-C105S
SM-C105
SM-C105A
SM-C101
I'm just providing here the Download Links of this ROOT Files for this Samsung Model.Always Do at your OWN risks.
All the credits goes to the maker of this root file and the uploader!More Power!
Posted by
komon
Tuesday, June 28, 2016
Lenovo A3300-GV Specs, Rooting,Hard Reset,Flashing,Firmware Download Link
Lenovo A3300-GV Specifications
Lenovo A3300-GV ,2G Network EDGE,GSM+Voice Call
Android 4.2
MTK6582 Quad Core 1.3 GHz
1GB Ram -8GB Internal Memory
7 inches 1024 × 600 Display
Camera 2.0 MP (back)+ 0.3 MP (front)
Bluetooth 4.0
WLAN 802.11b/g/n
GPS
Battery 3500 mAh
Details
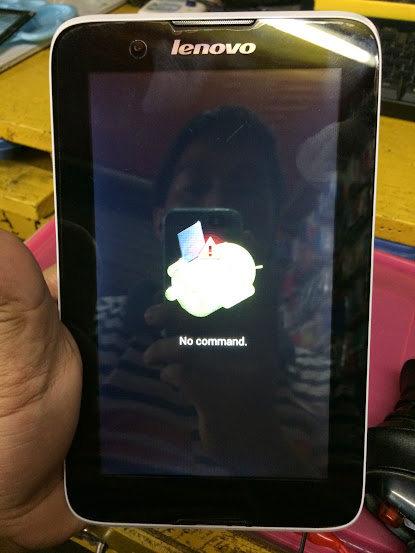


Download:
Lenovo A3300-GV Firmware password:mobilesupport
Something Wrong In my Post!Feel Free to Comment Below
Enhanced Stereo Speakers
Enjoy an enhanced audio experience for all multimedia including video, games and music. The A7-30’s dual stereo speakers are spaced apart for better stereo effects and oriented toward the front of the tablet for a richer user experience.
Dolby� Digital Plus
Dolby� audio enhancement allows louder, more natural, distortion-free sound – whether you’re listening through headphones or the integrated speakers.
Quad Core Processing
Quad core processing enables better multitasking, delivers a smoother Android experience and eliminates stutter when playing games or HD video.
Complete Connectivity
Micro USB for charging and connecting peripherals, plus a micro SD card slot for convenience and easy storage expandability.
Satellite GPS and Phone Functionality
Never get lost with built in satellite GPS that works offline, and you can even make voice calls with 2G wireless support through a SIM card slot.
7" HD Display
The 7” HD display offers a clear and colorful viewing experience whether indoors or outside.
Pocket Size Comfort
At less than 10mm thin and only weighing 327g the A7-30 is a perfect size for reading, listening to music, and web-surfing – and it can easily slide into a pocket when not in use.
Long Battery Life
The A7-30 offers up to 8 hours of WiFi browsing on a single battery charge.
How To Root Using Vroot
Download & install vRoot latest version on a windows PC.
Have a full backup of your device.
Switch on USB debugging mode on your Android device.
Have updated USB drivers and working properly.
Connect your device to the PC via USB cable.
Stay until vRoot detect your device.
Click ROOT button and relax till vRoot complete the process it self
Here Is My Video!
In Case you forgot your Pattern Password or Any related Password,Peform a Hard Reset Using Hardware Keys will Fix your problem.But keep in mind that by Performing a hard reset will completely delete all save data in your Tablet including messages,contacts and newly Installed Apps.
Here's What To do
1.Turn-Off Tablet
2.Hold and Press Volume up and Power Button until you see Android Lying with Exclamation Points
3.From there Press Power Button to go to Android System Recovery
4.Use Volume down to select wipe data/factory reset,Volume up to enter or confirm
5.Select Yes-delete all user data
6.Reboot System
7.Follow on screen to continue using tablet
In Case you Brick your Lenovo A3300-GV Tablet or Always Hangs and Freeze and Performing a Hard Reset not solving your Problem,Maybe Flashing to Stock Firmware will Fix the Problem.Since this tablet is MTK Chips use Sp Flash Tools,Use Search Button at the Right side of my blog to Download it and Refer to my Previous Post on how to Use Sp Flash Tools.Anyway you can Download the Firmware Below..
Download:
Lenovo A3300-GV Firmware password:mobilesupport
Something Wrong In my Post!Feel Free to Comment Below
Posted by
komon
Friday, June 24, 2016
How To Root ArcMobile Prime 402D Using iRoot
These are the instructions to root ArcMobile Prime 402D using iRoot software.Just Follow below step by steps procedures to root your ArcMobile Prime 402D.
Downloads:
iRoot
Drivers Auto-installer
Requirements:Your ArcMobile Prime 402D should have atleast 50-60 percent of battery to perform the rooting process.
2.Download and Install iRoot in your PC
3.Open iRoot Software
4.Connect Your phone to the USB Cable and wait until detected by iRoot
5.After fully detected by iRoot,Click the root button
6.Wait now until root process success and your phone will automatically reboot
Here's The Video:
7.Now,to make sure you have successfully rooted your ArcMobile Prime 402D,Open applications menu on your ArcMobile Prime 402D and find Kinguser App.If this app exist on your phone then it means you have successfully rooted your device.Congratulations.
Optional:You can also verify that your device is successfully rooted or not by Root Checker Application.
Downloads:
iRoot
Drivers Auto-installer
Requirements:Your ArcMobile Prime 402D should have atleast 50-60 percent of battery to perform the rooting process.
Root ArcMobile Prime 402D Using iRoot
1.Download and Install the drivers of your phone2.Download and Install iRoot in your PC
3.Open iRoot Software
4.Connect Your phone to the USB Cable and wait until detected by iRoot
5.After fully detected by iRoot,Click the root button
6.Wait now until root process success and your phone will automatically reboot
Here's The Video:
7.Now,to make sure you have successfully rooted your ArcMobile Prime 402D,Open applications menu on your ArcMobile Prime 402D and find Kinguser App.If this app exist on your phone then it means you have successfully rooted your device.Congratulations.
 |
| Kinguser App |
Optional:You can also verify that your device is successfully rooted or not by Root Checker Application.
 |
| Verify Root |
I hope this tutorial help you Rooted your ArcMobile Prime 402D!If you have a Question feel free to use comment below!
Posted by
komon
Saturday, June 18, 2016
How To Root Cherry Mobile Flare 2.0 Using iRoot
These are the instructions to root Cherry Mobile Flare 2.0 using iRoot software.Just Follow below step by steps procedures to root your Cherry Mobile Flare 2.0.
Downloads:
iRoot
Drivers Auto-installer
Requirements:Your Cherry Mobile Flare 2.0 should have atleast 50-60 percent of battery to perform the rooting process.
2.Download and Install iRoot in your PC
3.Open iRoot Software
4.Connect Your phone to the USB Cable and wait until detected by iRoot
5.After fully detected by iRoot,Click the root button
6.Wait now until root process success and your phone will automatically reboot
Here's The Video:
7.Now,to make sure you have successfully rooted your Cherry Mobile Flare 2.0,Open applications menu on your Cherry Mobile Flare 2.0 and find Kinguser App.If this app exist on your phone then it means you have successfully rooted your device.Congratulations.
Optional:You can also verify that your device is successfully rooted or not by Root Checker Application.
Downloads:
iRoot
Drivers Auto-installer
Requirements:Your Cherry Mobile Flare 2.0 should have atleast 50-60 percent of battery to perform the rooting process.
Root Cherry Mobile Flare 2.0 Using iRoot
1.Download and Install the drivers of your phone2.Download and Install iRoot in your PC
3.Open iRoot Software
4.Connect Your phone to the USB Cable and wait until detected by iRoot
5.After fully detected by iRoot,Click the root button
6.Wait now until root process success and your phone will automatically reboot
 |
| Successfully Rooted |
Here's The Video:
7.Now,to make sure you have successfully rooted your Cherry Mobile Flare 2.0,Open applications menu on your Cherry Mobile Flare 2.0 and find Kinguser App.If this app exist on your phone then it means you have successfully rooted your device.Congratulations.
 |
| Kinguser will appear in menu |
Optional:You can also verify that your device is successfully rooted or not by Root Checker Application.
 |
| Verify Root |
I hope this tutorial help you Rooted your Cherry Mobile Flare 2.0!If you have a Question feel free to use comment below!
Posted by
komon
Saturday, June 11, 2016
How To Root Cherry Mobile Omega Icon using iRoot on Android 4.3
These are the instructions to root Cherry Mobile Omega Icon using iRoot software.Just Follow below step by steps procedures to root your Cherry Mobile Omega Icon.
Downloads:
iRoot
Drivers Auto-installer
Requirements:Your Cherry Mobile Flare S3 should have atleast 50-60 percent of battery to perform the rooting process.
2.Download and Install iRoot in your PC
3.Open iRoot Software
4.Connect Your phone to the USB Cable and wait until detected by iRoot
5.After fully detected by iRoot,Click the root button
6.Wait now until root process success and your phone will automatically reboot
Here's The Video:
7.Now,to make sure you have successfully rooted your Cherry Mobile Omega Icon,Open applications menu on your Cherry Mobile Omega Icon and find SuperUser App.If this app exist on your phone then it means you have successfully rooted your device.Congratulations.
Optional:You can also verify that your device is successfully rooted or not by Root Checker Application.
Downloads:
iRoot
Drivers Auto-installer
Requirements:Your Cherry Mobile Flare S3 should have atleast 50-60 percent of battery to perform the rooting process.
Root Cherry Mobile Omega Icon Using iRoot
1.Download and Install the drivers of your phone2.Download and Install iRoot in your PC
3.Open iRoot Software
4.Connect Your phone to the USB Cable and wait until detected by iRoot
5.After fully detected by iRoot,Click the root button
6.Wait now until root process success and your phone will automatically reboot
 |
| After Finish Rooting using iRoot |
Here's The Video:
7.Now,to make sure you have successfully rooted your Cherry Mobile Omega Icon,Open applications menu on your Cherry Mobile Omega Icon and find SuperUser App.If this app exist on your phone then it means you have successfully rooted your device.Congratulations.
 |
| SuperUser will appear in menu |
Optional:You can also verify that your device is successfully rooted or not by Root Checker Application.
 |
| Verify Root |
I hope this tutorial help you Rooted your Cherry Mobile Omega Icon!If you have a Question feel free to use comment below!
Posted by
komon
Saturday, June 4, 2016
How to Root Cherry Mobile Flare S3 Using iRoot
These are the instructions to root Cherry Mobile Flare S3 using iRoot software.Just Follow below step by steps procedures to root your Cherry Mobile Flare S3.
Downloads:
iRoot
Drivers Auto-installer
Requirements:Your Cherry Mobile Flare S3 should have atleast 50-60 percent of battery to perform the rooting process.
2.Download and Install iRoot in your PC
3.Open iRoot Software
4.Connect Your phone to the USB Cable and wait until detected by iRoot
5.After fully detected by iRoot,Click the root button
6.Wait now until root process success and your phone will automatically reboot
Here's The Video:
7.Now,to make sure you have successfully rooted your Cherry Mobile Flare S3,Open applications menu on your Cherry Mobile Flare S3 and find SuperUser App.If this app exist on your phone then it means you have successfully rooted your device.Congratulations.
Optional:You can also verify that your device is successfully rooted or not by Root Checker Application.
Downloads:
iRoot
Drivers Auto-installer
Requirements:Your Cherry Mobile Flare S3 should have atleast 50-60 percent of battery to perform the rooting process.
Root Cherry Mobile Flare S3 Using iRoot
1.Download and Install the drivers of your phone2.Download and Install iRoot in your PC
3.Open iRoot Software
4.Connect Your phone to the USB Cable and wait until detected by iRoot
5.After fully detected by iRoot,Click the root button
6.Wait now until root process success and your phone will automatically reboot
Here's The Video:
7.Now,to make sure you have successfully rooted your Cherry Mobile Flare S3,Open applications menu on your Cherry Mobile Flare S3 and find SuperUser App.If this app exist on your phone then it means you have successfully rooted your device.Congratulations.
 |
| SuperUser will appear in Menu |
Optional:You can also verify that your device is successfully rooted or not by Root Checker Application.
 |
| Verify root |
I hope this tutorial help you Rooted your Cherry Mobile Flare S3!If you have a Question feel free to use comment below!
Posted by
komon
Friday, June 3, 2016
Huawei Kestrel EE G535-L1 Root And Unlock
I want to share How to root and unlock Huawei Kestrel EE G535-L1.Before you can unlock the Huawei Kestrel EE G535-L1 using SigmaKey Box Software to it's SIM provider you must root first the phone using iRoot.
Now,Proceed to unlocking using Sigmakey Box Software

How to Root Huawei Kestrel EE G535-L1 using iRoot
- Download and Install iRoot in your PC
- Open iRoot Software
- Connect Your phone to the USB Cable and wait until detected by iRoot
- After fully detected by iRoot,Click the root button
- Wait now until root process success and your phone will automatically reboot
 |
| Successfully Rooted |
Now,to make sure you have successfully rooted your Huawei Kestrel EE G535-L1,Open applications menu on your Huawei Kestrel EE G535-L1 and find SuperUser App.If this app exist on your phone then it means you have successfully rooted your device.Congratulations.
 |
| SuperUser |
Now,Proceed to unlocking using Sigmakey Box Software
How To Direct Unlock Huawei Kestrel EE G535-L1
- Open SigmaKey Box
- Select ADB in Platform
- Select Composite ADB Interface in Serial Port
- Press Direct Unlock
- Wait Until Finish
Don't Forget to Like Us on Facebook,Follow us on Google+
Posted by
komon
Thursday, June 2, 2016
How To Root & Unlock Samsung Galaxy Tab 3 4G (SM-T315)
These are the instructions to root and unlock Samsung Galaxy Tab 3 4G SM-T315 (running on Android 4.4.2) using Odin on windows operating system and Octopus Box Software.
Download:
Samsung Galaxy Tab 3 4G SM-T315 Root File
Samsung USB Drivers credits to Androidxda.com
Requirements:Your Samsung Galaxy Tab 3 4G (SM-T315) should have atleast 50-60 percent of battery to perform the rooting process.
First,We root this tab and then we proceed to unlock using Octopus Box Software.
2.Download and Extract Root file in a folder in desktop to easily navigation.
3.Now,Switch off your tablet
4.Now Boot to Download Mode.To boot to Download Mode press and hold Volume down,Home Button and Power Button for 5 to 8 seconds until download Mode is active
5.In the Download Mode you will be able to see a Warning Yellow triangle Sign.In this situation you have to press volume up key to continue
6.Now,Open Odin3 (found in the extracted files,that you downloaded in above post).Then connect your tab to computer using Micro USB Cable.
7.Once you have connected the tab to the computer,Odin will automatically recognize your device and show ''added'' message at the lower left panel.
8. Now,Click on PDA and browse for CF-Auto-Root (You have downloaded this file in above post)
9.Now,click on start button in odin to begin the flashing
10.Flashing usually takes 30-50 seconds to complete the rooting process on your Samsung Galaxy Tab 3 4G (SM-T315).Once rooting process is complete you will be able to see a green box with pass written on it in Odin.During this process Tab will automatically Reboot.
11.Once you see,Pass message in Odin,Now,to make sure you have successfully rooted your Samsung Galaxy Tab 3 4G (SM-T315),Open applications menu on your Samsung Galaxy Tab 3 4G (SM-T315) and find SuperSU App.If this app exist on your phone then it means you have successfully rooted your device.Congratulations.

Optional:You can also verify that your device is successfully rooted or not by Root Checker Application.

Download:
Samsung Galaxy Tab 3 4G SM-T315 Root File
Samsung USB Drivers credits to Androidxda.com
Requirements:Your Samsung Galaxy Tab 3 4G (SM-T315) should have atleast 50-60 percent of battery to perform the rooting process.
First,We root this tab and then we proceed to unlock using Octopus Box Software.
Root Samsung Galaxy Tab 3 4G (SM-T315) using odin
1.Download and Install Samsung USB Drivers on your computer.If samsung USB Driver is already installed on your computer then skip this step.2.Download and Extract Root file in a folder in desktop to easily navigation.
3.Now,Switch off your tablet
4.Now Boot to Download Mode.To boot to Download Mode press and hold Volume down,Home Button and Power Button for 5 to 8 seconds until download Mode is active
5.In the Download Mode you will be able to see a Warning Yellow triangle Sign.In this situation you have to press volume up key to continue
6.Now,Open Odin3 (found in the extracted files,that you downloaded in above post).Then connect your tab to computer using Micro USB Cable.
7.Once you have connected the tab to the computer,Odin will automatically recognize your device and show ''added'' message at the lower left panel.
8. Now,Click on PDA and browse for CF-Auto-Root (You have downloaded this file in above post)
9.Now,click on start button in odin to begin the flashing
10.Flashing usually takes 30-50 seconds to complete the rooting process on your Samsung Galaxy Tab 3 4G (SM-T315).Once rooting process is complete you will be able to see a green box with pass written on it in Odin.During this process Tab will automatically Reboot.
 |
| After Finish Rooting in Odin3 |
11.Once you see,Pass message in Odin,Now,to make sure you have successfully rooted your Samsung Galaxy Tab 3 4G (SM-T315),Open applications menu on your Samsung Galaxy Tab 3 4G (SM-T315) and find SuperSU App.If this app exist on your phone then it means you have successfully rooted your device.Congratulations.
Optional:You can also verify that your device is successfully rooted or not by Root Checker Application.
Now,Root Process is complete we can now proceed to unlock this device using Octopus Box Software.
Unlock Samsung Galaxy Tab 3 4G (SM-T315) using Octopus Box Software:
Welcome to Octoplus/Octopus Box Samsung software version 1.7.8
To connect SM-T315 phone you have to perform the following steps:
1. Disconnect USB cable from phone.
2. Go to Menu->Settings->More->About Device.
3.Tap on "Build number" 7 times to enable developer options.
4. Go to Menu->Settings->More->Developer options.
5. Turn on "USB Debugging" option.
6. Go to dial window.
7. Enter "*#0808#" number.
8. Select "DM+MODEM+ADB".
9. Press Home button.
10. Go to dial window.
11. Enter "*#9090#" number.
12. Set "Diag config" to "DM/DUM over HSIC" value.
13. Restart phone.
14. Press "Read Info" in software.
15.Press Unlock and Follow on software instructions to unlock the device.
16.Wait unlock process complete
Credits:Big Thanks to Chainfire for their CF Auto root file for Samsung Galaxy Tab 3 4G (SM-T315),without this tool this tutorial not possible.
Posted by
komon
How To Root Starmobile Up+ Using iRoot
These are the instructions to root Starmobile Up+ using iRoot software.Just Follow below step by steps procedures to root your Starmobile Up+.
Downloads:
iRoot
Drivers Auto-installer
Requirements:Your Starmobile Up+ should have atleast 50-60 percent of battery to perform the rooting process.
2.Download and Install iRoot in your PC
3.Open iRoot Software
4.Connect Your phone to the USB Cable and wait until detected by iRoot
5.After fully detected by iRoot,Click the root button
6.Wait now until root process success and your phone will automatically reboot

7.Now,to make sure you have successfully rooted your Starmobile Up+,Open applications menu on your Starmobile Up+ and find SuperUser App.If this app exist on your phone then it means you have successfully rooted your device.Congratulations.
 Optional:You can also verify that your device is successfully rooted or not by Root Checker Application.

Downloads:
iRoot
Drivers Auto-installer
Requirements:Your Starmobile Up+ should have atleast 50-60 percent of battery to perform the rooting process.
Root Starmobile Up+ Using iRoot
1.Download and Install the drivers of your phone2.Download and Install iRoot in your PC
3.Open iRoot Software
4.Connect Your phone to the USB Cable and wait until detected by iRoot
5.After fully detected by iRoot,Click the root button
6.Wait now until root process success and your phone will automatically reboot
7.Now,to make sure you have successfully rooted your Starmobile Up+,Open applications menu on your Starmobile Up+ and find SuperUser App.If this app exist on your phone then it means you have successfully rooted your device.Congratulations.
Posted by
komon
Subscribe to:
Posts (Atom)