Showing posts with label FLASHING. Show all posts
Showing posts with label FLASHING. Show all posts
Tuesday, December 20, 2016
How To Flash Starmobile Up to Stock Firmware With Firmware Download Link
I want to share today How To Flash Starmobile Up to Stock Firmware using SP Flash Tool.Do the flashing of new firmware if you encountered hang in logo,white screen only and specially the boot loop problems.
All the credits goes to the facebook group Starmobile Up Custom Development for sharing me this firmware that I use to fix my Starmobile Up which I want also to share with you guys!Download It below in my post.
First thing first,before anything else,charge your battery atleast 70 percent above and make sure your smartphone is detected by your PC using this driver-driver auto installer.Download this and extract it and put in desktop and run the install-window batch file.Like shown in the image.

After finish downloading,Extract all in one folder in desktop to easily navigate the file.
Now,Open Sp Flash tool


*Volume up and Power button
*Use volume Down to navigate to highlight and power button to confirm

*reboot system and follow on screen to continue using phone

Your IMEI now is invalid,you can rewrite your IMEI using MTK Droid Tool or by Engineering Mode.you can search it in google how to use this method!I will update this post if I have the tutorial how to use this method.
Since i have a Volcano Box,I use this software to rewrite the IMEI!
Note:Volcano Box is Paid Tools for Professional CP Technician.

Here is the Starmobile Up:


Starmobile Up. Password:
driver auto installer
SP Flash Tool v5.1343.1
That's It Very Easy!
Something Wrong in my Post?Feel Free to comment Below!
Don't Forget to Like us on Facebook or Subscribe to us via E-mail
Posted by
komon

Sunday, December 18, 2016
How To Update Samsung Galaxy Note 3 (SM-N9005) To Android 4.4.2 KitKat
Yesterday,I share with you How to Root Samsung Galaxy Note 3 (SM-N9005) Running on Android 4.4.2 KitKat.This time I want to share with you How To Update Samsung Galaxy Note 3 (SM-N9005) To Android 4.4.2 KitKat.Do this method if you encountered in your note 3 like force close,freezes and hang in logo or just want to update to the latest Android Version on your phone.Before doing this make sure your battery is fully charge and keep in mind that by doing this all important data save in your phone will completely deleted.
– check the device’s model number by opening the ‘About Device’ section and checking the info listed there.
– don’t attempt to update any other smartphones nor tablets with the files that you will find in this article as you’re risking damaging your device.
1.Download the N9005ZHUENJ1_N9005ZZHENJ1_TGY zip firmware from here.
– you need to create an account at SamMobile before being able to download the firmware file from them.
– create the account and click the download link once again.
I hope that you did manage to update your smartphone with the instructions that I’ve listed above. If the installation failed, then you should read the notes below.
NOTE 1: If ODIN displays the ‘FAIL’ alert, the phone enters into a bootloop, it freezes or something blocks the installation, then you should try to repeat the entire tutorial once again. Make sure not to skip any steps and to ask for more help in comments.
NOTE 2: If ODIN says that the process was passed, but the phone is unable to go past the Samsung boot animation, it enters into a boot loop or it boots and it shows too many errors, then you will be forced to apply an Android Factory Reset. Below you can find all info but, factory reset process will wipe all data from the system partition:
That’s it, now you simply need to enter your Google / Samsung account info and then you can start testing the new Android 4.4.2 KitKat official firmware on your Galaxy Note 3 device.
Here’s what you need to know before getting to the tutorial:
*Use this tutorial only with the Samsung Galaxy Note 3 model number SM – N9005.– check the device’s model number by opening the ‘About Device’ section and checking the info listed there.
– don’t attempt to update any other smartphones nor tablets with the files that you will find in this article as you’re risking damaging your device.
*install the Samsung USB Drivers for your computer.
– without these drivers your PC won’t connect to your smartphone and ODIN, the app you will use to flash the update, will not detect the Note 3.
– without these drivers your PC won’t connect to your smartphone and ODIN, the app you will use to flash the update, will not detect the Note 3.
*Disable the Samsung KIES from running on your computer.
*Disable the antivirus apps that are opened on your PC.
*Enable USB Debugging for your phone from its Developer Options menu.
– in case Developer Options doesn’t show up in Settings, then you will need to enable them – learn here on how to enable USB Debugging for Samsung phone.
– in case Developer Options doesn’t show up in Settings, then you will need to enable them – learn here on how to enable USB Debugging for Samsung phone.
*If your Note 3 smartphone is running a stock ROM you can be sure that no files will be removed in the process.
*However, if your phone features a custom ROM then you should know that the flashing process of XXUDND1 KitKat update will remove all data from the system partition.
– use Helium for Android if you want to backup data from installed apps or SMS text messages.
– also, sync Contacts data with your Gmail account.
– use Helium for Android if you want to backup data from installed apps or SMS text messages.
– also, sync Contacts data with your Gmail account.
*If your device features any custom Recovery on it, then this will be removed in the process and a stock Recovery will be flashed instead.
*Rooted Note 3 phones will have their root access after flashing a stock Android 4.4.2 ROM.
*Check your phone’s battery charge level and make sure that it is over 50%, so that the phone won’t switch off in the middle of the updating process.
*Use this guide only if you’re an advanced user and you know what you’re doing.
*Note that we won’t be held responsible in case you brick your phone or lose any data in the process.
*Read the entire post first and do not skip any steps if you want to complete the guide at the first attempt.
Now that you know all of the above you can continue to the next part of this article.
Now that you know all of the above you can continue to the next part of this article.
How To Update Samsung Galaxy Note 3 (SM-N9005) To Android 4.4.2 KitKat:
1.Download the N9005ZHUENJ1_N9005ZZHENJ1_TGY zip firmware from here.
– you need to create an account at SamMobile before being able to download the firmware file from them.
– create the account and click the download link once again.
2.Extract the N9005ZHUENJ1_N9005ZZHENJ1_TGY zip contents and save the files on your computer.
– you will get a tar.md5 file and you shouldn’t extract any further than that.
– you will get a tar.md5 file and you shouldn’t extract any further than that.
3.Download ODIN 3.09 from here.
– extract ODIN’s contents and place the files in a single folder on your computer.
– extract ODIN’s contents and place the files in a single folder on your computer.
4.Switch off your Galaxy Note 3 now.
5.Boot the phone in Download Mode.
– if you can’t boot Download Mode, then you can learn with this post.
– if you can’t boot Download Mode, then you can learn with this post.
6.Launch ODIN executable now.
7.Connect the Note 3 to your computer via USB data cable.
– note that in case ODIN doesn’t detect the phone, then you will be forced to re-install the Samsung USB Drivers once again, the download link is in the preparation guide above.
– note that in case ODIN doesn’t detect the phone, then you will be forced to re-install the Samsung USB Drivers once again, the download link is in the preparation guide above.
8.Go back to ODIN and click on the AP button.
9.Browse for the N9005ZHUENJ1_N9005ZZHENJ1_TGY tar.md5 firmware file. Load it into ODIN.
– make sure that the ‘Re-partition’ option is not enabled.
– don’t change any other default options.
– make sure that the ‘Re-partition’ option is not enabled.
– don’t change any other default options.
10.Hit the START button when everything is set and you’re ready for the updating process to begin.
– don’t press any buttons until all files are flashed successfully.
– don’t press any buttons until all files are flashed successfully.
11.When the update is complete ODIN will display the ‘PASS’ alert and the phone reboots in normal mode.
 |
| After flashing in Odin3 |
12.Log into your home screen and that should be all.
I hope that you did manage to update your smartphone with the instructions that I’ve listed above. If the installation failed, then you should read the notes below.
NOTE 1: If ODIN displays the ‘FAIL’ alert, the phone enters into a bootloop, it freezes or something blocks the installation, then you should try to repeat the entire tutorial once again. Make sure not to skip any steps and to ask for more help in comments.
NOTE 2: If ODIN says that the process was passed, but the phone is unable to go past the Samsung boot animation, it enters into a boot loop or it boots and it shows too many errors, then you will be forced to apply an Android Factory Reset. Below you can find all info but, factory reset process will wipe all data from the system partition:
- power off the phone completely.
- next, boot it into Android Recovery Mode.– if you’re unable to boot Recovery follow the info listed here.
- from the recovery menu you should select ‘wipe data/ factory reset’.
- confirm the process.
- after the factory reset is complete you should reboot the device in normal mode.
That’s it, now you simply need to enter your Google / Samsung account info and then you can start testing the new Android 4.4.2 KitKat official firmware on your Galaxy Note 3 device.
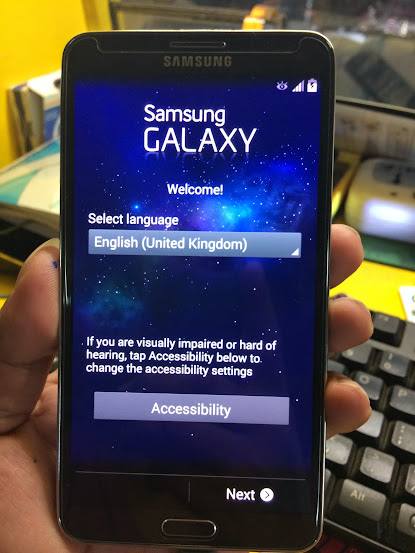 |
| Follow on screen to continue using phone |
Source:Android Geeks
That's It Very Easy!
Something Wrong in my Post?Feel Free to comment Below!
Don't Forget to Like us on Facebook or Subscribe to us via E-mail
Posted by
komon
Starmobile Diamond D1 Firmware Download With Guide How To Flash new Firmware Using SPFT
This Tutorial will guide you the steps that you should follow How To Flash new Firmware in your Starmobile Diamond D1 Using SPFT.Flash new firmware if you have encountered hangs.freezes.force close and hang in logo or even if rebooting problem in your phone.First thing first,Let's take a look key specifications of this phone.
 |
| Starmobile Diamond D1 |
Starmobile Diamond D1 Specs:
5-inch FWVGA display (480 x 854 resolution), 195 ppiDragontrail scratch-resistant glass
1.2 GHz quad-core MT6589M processor
PowerVR SGX544MP GPU @ 156MHz
1GB RAM, 4GB ROM, microSD up to 32GB
Android 4.2 Jelly Bean
Dual SIM, Dual 3G Standby
12-mp autofocus BSI rear camera with flash
8-mp autofocus BSI front camera
FM Radio, Bluetooth, WiFi
147.5 x 74 x 10.3mm
204g
3000mAh battery
Download All This File:
Starmobile Diamond D1 Firmware Password:SPFT
Driver Auto Installer
How To Flash new Firmware Using SPFT
1.Download and Extract SP Flash Tool2.Open SP Flash Tool

4.Click Download
5.Connect your Phone to Micro USB (Make sure Diamond D1 is Off)
6.Wait until Flashing is completed (You can see a window with circle green)
7.Remove your phone to USB and boot in Recovery Mode and wiped data
8.Wait until complete Power On
Note:First boot will take longer minutes,just wait until boot
That's It Very Easy!
Something Wrong in my Post?Feel Free to comment Below!
Don't Forget to Like us on Facebook or Subscribe to us via E-mail
Don't Forget to Like us on Facebook or Subscribe to us via E-mail
Posted by
komon
Thursday, December 15, 2016
Neo OmniPad A74 ATM7021A And ATM7021A TW_J0711_V32 Android Tablet Firmware Download Link
Flash New firmware in your ATM7021A Android Tablet if you have encountered hangs,force close,rebooting,hang in android logo and any forgotten passwords in your ATM7021A Android Tablet.
CPU: ATM7021A
Brand : Unknown
Dual Camera
China Tablet
Download: TW_J0711_V32 ATM Tablet Firmware .
Password :
See flashing tutorial for ATM702X Tablet .
flashing Tools and Tutorials for ATM702X Tablets. Credits to Its All about Android

CPU:ATM7021A
Brand:Neo OmniPad
Model:A74
China Tablet
Download Firmware:
Neo OmniPad A74 ATM7021A
Flashing Tools and Tutorials are also included in download files!
Something Wrong in my Post?Feel Free to comment Below!
Don't Forget to Like us on Facebook or Subscribe to us via E-mail
ATM7021A TW_J0711_V32 Firmware
CPU: ATM7021A
Brand : Unknown
Dual Camera
China Tablet
 |
| Neo OmniPad |
Password :
See flashing tutorial for ATM702X Tablet .
flashing Tools and Tutorials for ATM702X Tablets. Credits to Its All about Android
Neo OmniPad A74 ATM7021A
CPU:ATM7021A
Brand:Neo OmniPad
Model:A74
China Tablet
Download Firmware:
Neo OmniPad A74 ATM7021A
Flashing Tools and Tutorials are also included in download files!
Something Wrong in my Post?Feel Free to comment Below!
Don't Forget to Like us on Facebook or Subscribe to us via E-mail
Posted by
komon
How To Use Phoenix Suit Flashing Tool [TUTORIAL]
These tutorial will guide you the steps that you should follow on How To Use Phoenix Suit Flashing Tool.Use Phoenix Suit to flash new firmware in your Allwinner A2X and A3X CPU based tablets.
How To Use Phoenix Suit Flashing Tool
Download and install Phoenix Suit . On first run it will be in Chinese language but after installation its in English do not panic .

Click on Highlighted option and wait for next installation window.

Let it run and install this driver software anyway .

Device driver installation wizard will run click on next

PhoenixSuit will complete installation process and Google Universal driver will be installed on computer.


Click Firmware and Browse your Firmware

Connect Tablet and Click Upgrade

Wait until Completed

That's It Very Easy!
Something Wrong in my Post?Feel Free to comment Below!
Don't Forget to Like us on Facebook or Subscribe to us via E-mail
Posted by
komon
Sunday, December 11, 2016
How To Install The Newest Android 4.4.4 for Sony XPERIA ZL C6503 With Firmware Download Link
This tutorial will guide you the steps that you should follow to Install The Newest Android 4.4.4 for your Sony XPERIA ZL C6503.This method will also fix hang in logo,rebooting,force close and also fix the forgotten pattern password or any forgotten password in your Sony XPERIA ZL C6503.First thing first,Let's take a look the specification of this smartphone.
1.5GHz quad-core Qualcomm MSM8064 Snapdragon S4 processor
Android 4.1.2 (Jelly Bean), upgradable to Android 4.4.4
Andreno 320 GPU
2GB of RAM
16GB of internal storage
microSD card slot up to 64GB
13MP autofocus Exmor RS for mobile camera with LED flash
1080p@30fps video recording
2MP front camera
Bluetooth v4.0 with A2DP
microUSB v2.0 / 3.5mm audio jack
Stereo FM radio with RDS
GPS with A-GPS support and GLONASS
Wi-Fi 802.11 a/b/g/n, dual-band, Wi-Fi Direct, DLNA, Wi-Fi hotspot
Accelerometer, gyro, proximity, compass
2,370mAh non-removable Li-Ion battery
131.6 x 69.3 x 9.8mm (dimension)
151g (weight)
b) download and install latest Flashtool from here (mirrors Google Drive, Ulozto or Mega)
c) download also latest Android 4.4.4 (mirror Google Drive or Mega) for Sony XPERIA ZL
d) paste the ftf file downloaded in step c) to folder „Firmware“ included in the XPERIA Flashtool
e) open the XPERIA Flashtool, click on flash and choose downloaded firmware, than click ok. Important - if you do not want to delete any data of your phone, just uncheck flashing userdata.sin file. All data will remain in your phone, but sometimes it can cause additional troubles. So it is better (and I recommend that) to do the backup of your personal data, than proceed with clean instalation and then restore your personal data.
f) turn off your phone and when Flashtool shows pop up window, connect phone to PC with holding volume down button
g) after few minutes all is done and your phone gets the new firmware
Sony Xperia ZL Specifications:
5-inch Full HD (1080x1920) Reality Display with Mobile BRAVIA Engine 2 (441ppi)1.5GHz quad-core Qualcomm MSM8064 Snapdragon S4 processor
Android 4.1.2 (Jelly Bean), upgradable to Android 4.4.4
Andreno 320 GPU
2GB of RAM
16GB of internal storage
microSD card slot up to 64GB
13MP autofocus Exmor RS for mobile camera with LED flash
1080p@30fps video recording
2MP front camera
Bluetooth v4.0 with A2DP
microUSB v2.0 / 3.5mm audio jack
Stereo FM radio with RDS
GPS with A-GPS support and GLONASS
Wi-Fi 802.11 a/b/g/n, dual-band, Wi-Fi Direct, DLNA, Wi-Fi hotspot
Accelerometer, gyro, proximity, compass
2,370mAh non-removable Li-Ion battery
131.6 x 69.3 x 9.8mm (dimension)
151g (weight)
How to install the newest Android 4.4.4 for Sony XPERIA ZL C6503
a) first of all, check your firmware version (if you already have the newest one, you do not need this tutorial)b) download and install latest Flashtool from here (mirrors Google Drive, Ulozto or Mega)
c) download also latest Android 4.4.4 (mirror Google Drive or Mega) for Sony XPERIA ZL
d) paste the ftf file downloaded in step c) to folder „Firmware“ included in the XPERIA Flashtool
e) open the XPERIA Flashtool, click on flash and choose downloaded firmware, than click ok. Important - if you do not want to delete any data of your phone, just uncheck flashing userdata.sin file. All data will remain in your phone, but sometimes it can cause additional troubles. So it is better (and I recommend that) to do the backup of your personal data, than proceed with clean instalation and then restore your personal data.
f) turn off your phone and when Flashtool shows pop up window, connect phone to PC with holding volume down button
g) after few minutes all is done and your phone gets the new firmware
 |
| After finish flashing |
Here is my finish product:
 |
| Finish Product |
Source:XPERIA FIRMWARE
That's It Very Easy!
Something Wrong in my Post?Feel Free to comment Below!
Don't Forget to Like us on Facebook or Subscribe to us via E-mail
That's It Very Easy!
Something Wrong in my Post?Feel Free to comment Below!
Don't Forget to Like us on Facebook or Subscribe to us via E-mail
Posted by
komon
Sunday, November 27, 2016
MyPhone Agua Iceberg Mini Firmware Download Link With Guide
MyPhone Iceberg Mini is a 5inch, you’re up to one viewing pleaser as it offers a Full (High-Definition) HD Display, 1.5 GHz Quad-Core Processor, 13 MP BSI Main Camera.
 |
| MyPhone Agua Iceberg Mini |
MyPhone Iceberg Mini Full Specs
1.5GHz Quad Core MT6589T ProcessorAndroid 4.2 Jelly Bean OS
5 Inch Full HD IPS Display at 1920x1080 Pixels
Continuous Grain Silicon Glass
PowerVR GPU
13 Megapixel Autofocus Main Camera with Dual LED Flash and BSI
5 Megapixel Front Camera
2GB of RAM
16GB of Internal Storage (12.47 Free)
Dual Sim/Dual Standby
Regular Sim + Micro-Sim
3G(HSDPA), EDGE and GPRS Networks
WiFi and WiFi Hotspot
Bluetooth v4.0
GPS with A-GPS
Ambient Light Light Sensor
Motion Sensor
Proximity Sensor
Magnetic Sensor
Gyroscope
FM Radio
3.5mm Audio Jack
2,000 mAh Li-ion Battery
This is stock firmware v1.12 untouched
Flash via SP Flash Tool
DOWNLOADS:
Stock ROM: MyPhone Iceberg Mini Firmware
If asking password when extracting put
Drivers
VCOM: http://d-h.st/4Mz
Tinno: http://adf.ly/5724890/http://www.mediafire.com/download/cd...091+Driver.exe
Garmin: http://www8.garmin.com/software/USBDrivers_231.exe
Procedure: same procedure what you did in flashing mmx a250 roms , scatter files included..
1. Install VCOM, TINNO, & GARMIN.
2. Open SPFLASHTOOL.
3. Click FILE, then select OPEN SCATTER-LOADING FILE and locateMT6589_Android_scatter_emmc.txt.
4. Automatically checks all files
if error appears, right click on recovery and locate the file
5. Click DOWNLOAD then click YES.
6. Connect USB CABLE to your PC.
7. Connect USB CABLE to your PHONE while holding the VOLUME DOWN.
successful flashing will show green circle
8. Disconnect USB CABLE then POWER ON your phone.
That's It Very Easy!
Something Wrong in my Post?Feel Free to comment Below!
Don't Forget to Like us on Facebook or Subscribe to us via E-mail
Posted by
komon
Tuesday, November 22, 2016
Cherry Mobile Fusion Breeze 2 TESTED Firmware With Download Link
This Firmware is not the stock firmware of Cherry Mobile Fusion Breeze 2 but this one is working and tested to Cherry Mobile Fusion Breeze 2.You need this firmware if you stuck on logo if performing a hard reset using hardware key still the problem persist.Install new firmware using Phoenix Suit.
Board ID: QA88 v1.3
Chips:Allwinner Dualcore-A23
Downloads:
Phoenix Suit
Cherry Mobile Fusion Breeze 2 Debrand Firmware
Password:
How To Install Firmware Using Phoenix Suit:
1.Download and Install Phoenix Suit to your PC2.Download Debrand Firmware
3.Open Phoenix Suit
4.Click Firmware and Browse your Firmware

Here's The Finish Product Without Cherry Mobile name:

That's It Very Easy!
Something Wrong in my Post?Feel Free to comment Below!
Don't Forget to Like us on Facebook or Subscribe to us via E-mail
Posted by
komon
Monday, November 21, 2016
How To Hard Reset Cherry Mobile Ace and How To Install New Firmware
Hello Good Day!I want to share How To Hard Reset Cherry Mobile Ace.Since this phone is SPD Chips Powered there is a very small chance that this phone have a hard reset using hardware keys.If you can't find the hard reset using hardware keys,Install new Pac files to this phone is other solution.I want to share also here the PAC File download Link..
2.Hold and Press Volume Down and Power Button
3.When Triangle with exclamation points comes out continue hold and Press Volume Down and Power Button for about 1 minute or more.
4.Then Press Volume Up to go to Android System Recovery
5.Use Volume Down to Select wipe data/factory reset,Power Button to confirm
6.Select Yes delete all user data,again Power Button to confirm
7.Finally after finish wiped,Reboot System
How To Install New Firmware on Cherry Mobile Ace using Research Download:
Refer to this Post Go Here
Download:
Cherry Mobile Ace PAC File
Pasword:
That's It Very Easy!
Something Wrong in my Post?Feel Free to comment Below!
Don't Forget to Like us on Facebook or Subscribe to us via E-mail
 |
| Cherry Mobile Ace Back |
Here's How To Hard Reset Cherry Mobile Ace:
1.Turn Off Phone2.Hold and Press Volume Down and Power Button
3.When Triangle with exclamation points comes out continue hold and Press Volume Down and Power Button for about 1 minute or more.
4.Then Press Volume Up to go to Android System Recovery
5.Use Volume Down to Select wipe data/factory reset,Power Button to confirm
6.Select Yes delete all user data,again Power Button to confirm
7.Finally after finish wiped,Reboot System
How To Install New Firmware on Cherry Mobile Ace using Research Download:
Refer to this Post Go Here
Download:
Cherry Mobile Ace PAC File
Pasword:
That's It Very Easy!
Something Wrong in my Post?Feel Free to comment Below!
Don't Forget to Like us on Facebook or Subscribe to us via E-mail
Posted by
komon
How To Flash New Firmware on Firefly Mobile GT100 With Firmware Download Link
Flash or Install new Firmware on your Firefly Mobile GT100 if it is in hang in logo,boot loop,force close and freezes if performing a Hard Reset using Hardware Keys not fixing the problem.There are Two method to flash or install new firmware on Firefly Mobile GT100.Since this phone is MTK Chips you can flash or install using SP flash Tools and Volcano Box Software.Just follow instructions below:
How To Flash New Firmware Using Volcano Box:
*Open Volcano Box Latest Version
*Select Android
*Select USB Mode
*Click Write Fac File
*CLICK Start then a window will come out,Click scatter loading
*Browse for MT6572_Android_scatter
*Finally Click Start
*Connect Phone while Pressing Volume Down
*Wait Until Finish

*CLICK Start then a window will come out,Click scatter loading
*Browse for MT6572_Android_scatter
*Finally Click Start
*Connect Phone while Pressing Volume Down
*Wait Until Finish
How To Flash New Firmware Using SP Flash Tools:
* Unpack FlashTools, and Click on Flash_tool.exe
* Select a the MT6572_Android_scatter_emmc.txt in ROM
* Wait file to be added into Flash Tool
* choose Option->USB Model,click USB Model
–> Choose Option->DA DownLoad All->Speed->High Speed, click High Speed
* Turn off your phone, remove the battery.
* "Press F9 (hit Download button)" OR " if upgrade ROM Firmware->Upgrade "
* and connect your phone into the computer via USB data cable.
* The process will start and a red progress bar will appear after color purple, yellow.
* And green circles display
* Finish !
- You can now safely disconnect your phone and turn it on.

That's It Very Easy!
Something Wrong in my Post?Feel Free to comment Below!
Don't Forget to Like us on Facebook or Subscribe to us via E-mail
Posted by
komon
Friday, November 18, 2016
Cherry Mobile Ruby Firmware Download Link
Here's the Firmware of Cherry Mobile Ruby which will you need if you have experiencing hangs,freezes,force close,hang in logo and boot loop,if performing a Hard Reset using Hardware keys not solving the problem.
So,Flashing new firmware is only the solution!Here's why I want to share here the Firmware Download Link.Find Out Below but before that let's take a look the specifications of this phone.
 |
| Cherry Mobile Ruby |
The Cherry Mobile Ruby is equipped with the optimized Android 4.2 Jelly Bean operating system. Experience fast and smooth performance in switching between apps with more reactive touch responses. With an enhanced interface catering one application to another, you can never go wrong with this treasure.Equipped with 1GHz dual core processor and Android operating system, it’s a good combination for providing smooth and seamless applications and features. Have a good experience of the most challenging games in top performance and high details.With its 4" touchscreen display, finding your way through the internet, games, and texts just got a whole lot easier. The screen is very bright, clear, and highly responsive to the touch.
Cherry Mobile Ruby Specifications:
Android 4.2 Jelly Bean
4" capacitive touchscreen
4GB internal storage (microSD up to 32GB)
1GHz dual core processor
Mali 400 GPU
Dual SIM
Camera: 5MP rear with LED flash, 0.3MP front
Wi-Fi 802.11 b/g/n, Bluetooth
1150mAh battery
Download:
Cherry Mobile Ruby Firmware
Sp Flash Tools
MTK Vcom Drivers
Refer To This Post How To Flash New Firmware On MTK Chips:
How To Flash New Firmware on Cherry Mobile Marble
How To Flash Stock Firmware on Cherry Mobile Emerald
Something Wrong in my Post?Feel Free to comment Below!
Don't Forget to Like us on Facebook or Subscribe to us via E-mail
Posted by
komon
Wednesday, November 16, 2016
How To Flash New Firmware on Cherry Mobile Marble with Firmware Download Link
Hello Good Morning!Lot's of people asking me if I have the firmware of Cherry Mobile Marble,there wish is granted because I have now the firmware which I want to share now.This firmware is usable if your phone have a problem like force close,hangs,freezes and boot loop if performing a Hard Reset using hardware keys not fixing the problem.First thing first,Let's take a look the specification of this phone.
The Cherry Mobile Marble gives you dual sim capabilities, allowing you to utilize two sim cards within just one mobile unit. Keep the world in your hands with the help of the Cherry Mobile phone. Pair your new device with soft cases and powerbanks all available at Lazada's Mobiles and Tablets section.
5MP Rear Camera, VGA Front Camera
Dual SIM
Android 4.2 Jelly Bean
Dual Core 1.3GHz MediaTek Processor
2G,3G, and HSPA+ Connectivity
4GB Internal Storage expandable to 32GB, 12MB RAM
1,420mAh battery
Download:
Sp Flash Tool
Drivers
Cherry Mobile Marble Firmware Password:
 |
| Cherry Mobile Marble |
Cherry Mobile Marble Specifications:
4" Capacitive WVGA Display5MP Rear Camera, VGA Front Camera
Dual SIM
Android 4.2 Jelly Bean
Dual Core 1.3GHz MediaTek Processor
2G,3G, and HSPA+ Connectivity
4GB Internal Storage expandable to 32GB, 12MB RAM
1,420mAh battery
Download:
Sp Flash Tool
Drivers
Cherry Mobile Marble Firmware Password:
Related:
How To Hard Reset Cherry Mobile Marble
2.a. Extract the contents of the firmware on a folder of your choice
2.b. Extract the SP Flash Tool package on a folder of your choice.
3. Open SP Flash Tool (DO NOT CONNECT YOUR PHONE YET). - Flash_tool.exe
4. Click on "Scatter-loading" on the right side of the screen.
5. Choose your scatter file from the firmware package (MT6572_Android_scatter.txt
6. Click "Download" at the top
7. Turn off your phone. To be safe, remove the battery and put it back but DO NOT TURN ON THE PHONE.
8. Connect the phone to the PC. The progress bar should move and show some activity.
9. When finished, the SP FLASH TOOL will tell you it's complete
10. You may disconnect the phone, then turn it on.
11. VERY IMPORTANT! Place the phone anywhere safe and don't touch it while booting. The phone will UPGRADE the TOUCH PANEL. When asked if you would like to upgrade, tap Yes or Proceed or whatever to make it start, then let it sit there for about 30 minutes until it is upgraded. DO NOT ATTEMPT TO REMOVE THE BATTERY unless it has already been an hour. IF YOU DON'T FOLLOW THIS YOU MIGHT BRICK YOUR PHONE.
12. The phone might need to reboot. Try the touch panel. If it works, then congratulations, your upgrade is done.
How To Flash New Firmware on Cherry Mobile Marble
1. Download and install the Cherry Mobile Marble DRIVERS.2.a. Extract the contents of the firmware on a folder of your choice
2.b. Extract the SP Flash Tool package on a folder of your choice.
3. Open SP Flash Tool (DO NOT CONNECT YOUR PHONE YET). - Flash_tool.exe
4. Click on "Scatter-loading" on the right side of the screen.
5. Choose your scatter file from the firmware package (MT6572_Android_scatter.txt
6. Click "Download" at the top
7. Turn off your phone. To be safe, remove the battery and put it back but DO NOT TURN ON THE PHONE.
8. Connect the phone to the PC. The progress bar should move and show some activity.
9. When finished, the SP FLASH TOOL will tell you it's complete
10. You may disconnect the phone, then turn it on.
11. VERY IMPORTANT! Place the phone anywhere safe and don't touch it while booting. The phone will UPGRADE the TOUCH PANEL. When asked if you would like to upgrade, tap Yes or Proceed or whatever to make it start, then let it sit there for about 30 minutes until it is upgraded. DO NOT ATTEMPT TO REMOVE THE BATTERY unless it has already been an hour. IF YOU DON'T FOLLOW THIS YOU MIGHT BRICK YOUR PHONE.
12. The phone might need to reboot. Try the touch panel. If it works, then congratulations, your upgrade is done.
That's It Very Easy!
Something Wrong in my Post?Feel Free to comment Below!
Don't Forget to Like us on Facebook or Subscribe to us via E-mail
Posted by
komon
How To Flash or Update GT-P6200 To Android 4.1.2 Using Odin Flasher
Flash your Tablet to Android 4.1.2 Using Odin Flasher if you have experiencing problem in your tablet like hangs,freezes,force close and hang in logo.Just follow instructions below on How To Flash or Update GT-P6200 To Android 4.1.2 Using Odin Flasher.
Tools, Drivers and Firmwares:
- Samsung P6200 Galaxy Tab 7.0 Plus Original Firmwares. You can also Download Firmware here
- USB Drivers.
- Odin Flasher ( P6200 ).
How To Update GT-P6200 To Android 4.1.2 Steps:
1. Extract The Downloaded Flasher,Firmwares package and USB drivers.
2. Install the USB drivers and Reboot your PC.
3. Run Odin Flasher and check these options: Re-Partition, Auto Reboot, F.Reset Time.
4. Click PDA and browse From the Extracted Firmware Package select the P6200XXME1_P6200OLBME1_P6200XXMC3_HOME.TAR.md5
5.At this Step you have to put the phone into Download Mode ( Volume Down + Power Key for 10 Sec ) then Press Volume Up Key to Enter Firmware Download Mode.
6. Connect USB cable to Phone and PC then install needed Drivers.
7. Make sure that the Odin Flasher Detects the COM number that the phone takes.
8. Click Start button to update the phone with these Firmware Files.
9. When all is Done in the right way the Odin Flasher will gives PASS! word In Green.
Now you can Remove cable from phone.
Do Full Reset by Code: *2767*3855#.
Here's The Samsung Galaxy Tab Plus:
That's It Very Easy!
Something Wrong in my Post?Feel Free to comment Below!
Don't Forget to Like us on Facebook or Subscribe to us via E-mail
Tools, Drivers and Firmwares:
- Samsung P6200 Galaxy Tab 7.0 Plus Original Firmwares. You can also Download Firmware here
- USB Drivers.
- Odin Flasher ( P6200 ).
How To Update GT-P6200 To Android 4.1.2 Steps:
1. Extract The Downloaded Flasher,Firmwares package and USB drivers.
2. Install the USB drivers and Reboot your PC.
3. Run Odin Flasher and check these options: Re-Partition, Auto Reboot, F.Reset Time.
4. Click PDA and browse From the Extracted Firmware Package select the P6200XXME1_P6200OLBME1_P6200XXMC3_HOME.TAR.md5
6. Connect USB cable to Phone and PC then install needed Drivers.
7. Make sure that the Odin Flasher Detects the COM number that the phone takes.
8. Click Start button to update the phone with these Firmware Files.
9. When all is Done in the right way the Odin Flasher will gives PASS! word In Green.
 |
| After finish flashing using Odin3 |
Now you can Remove cable from phone.
Do Full Reset by Code: *2767*3855#.
Here's The Samsung Galaxy Tab Plus:
 |
| Finish Product |
That's It Very Easy!
Something Wrong in my Post?Feel Free to comment Below!
Don't Forget to Like us on Facebook or Subscribe to us via E-mail
Posted by
komon
Monday, November 7, 2016
How To Flash GT-E1200Y Using Volcano Box with Tested Flash Files
The Problem of this phone is phone lock,I've tried in Z3X Box and I get some error.Since this phone is SPD Chip so I try in Volcano Box.Must have Volcano Box and E210 Cable.Here's What you should do.First thing first download the bin file that you will use to flash in your phone.(Link Below)
Download:
GT-E1200Y Flash file
1.Open Volcano Box
2.Select SPD in Tab
3.Select Boot file Built in boot 13
4.Load Flash file
5.Select Write Flash
6.Auto detect pin-out must be checked
7.Click Run
8.Connect Phone to E210 Cable while pressing Home Button
9.Wait Until Done
10.After finish flashing,select unlock code
 Here's the GT-E1200Y Without Password:

That's It Very Easy!
Something Wrong in my Post?Feel Free to comment Below!
Don't Forget to Like us on Facebook or Subscribe to us via E-mail
Read more »
Download:
GT-E1200Y Flash file
1.Open Volcano Box
2.Select SPD in Tab
3.Select Boot file Built in boot 13
4.Load Flash file
5.Select Write Flash
6.Auto detect pin-out must be checked
7.Click Run
8.Connect Phone to E210 Cable while pressing Home Button
9.Wait Until Done
10.After finish flashing,select unlock code
That's It Very Easy!
Something Wrong in my Post?Feel Free to comment Below!
Don't Forget to Like us on Facebook or Subscribe to us via E-mail
Posted by
komon
Friday, October 28, 2016
T733-MAINBOARD-V2.1 Firmware Download Link
 |
| T733-MAINBOARD-V2.1 |
This is the firmware for china tablet that has the same board ID. You can also use this firmware in t733 mainboard version 2.0. There is an instance that the front facing camera might not work for this kind of tablet. Because of different camera drivers.But this firmware is base on my experience all working,back and front camera and wifi also works very fine!
Can be flash on Phoenix Card,Phoenix Suite and Livesuite
Download Firmware Here:
t733-mainboard-v2.1 tested firmware - 317.55 MBFinish Product

That's It Very Easy!
Something Wrong in my Post?Feel Free to comment Below!
Don't Forget to Like us on Facebook or Subscribe to us via E-mail
Posted by
komon
Wednesday, October 26, 2016
How To Solve Privacy Protection on MyPhone Rio Craze
After Performing a hard-reset in your MyPhone Rio Craze still asking for Privacy Protection?Do this method to solve your problem,Flashing a new firmware will solve this kind of problem.Just Follow instructions below,But First download all important files as provided below.
Download This:
MyPhone Rio Craze Firmwares Password:marshub
Sp Flash Tools
Warning:By doing this method all your important data will completely wipe,so be sure you have already back-up your important data in your pc or laptop...
Procedures:
1.After you finish downloading files,Extract all file in desktop

Note: Make sure that you have created your folder to locate your file
2. After the files have been extracted, open the “SP Flash Tool v5.1352.01” folder and look for the green logo icon named “flash_tool.exe”

3.Click Scatter-loading and browse your MT6571_Android_scatter and click open

4.Select Format all+Download and click Download (Base on image below)

5.Connect Phone to USB Cable and wait until Finish
The Green Circle will appear meaning “Job Done”.
Posted by
komon
Wednesday, October 12, 2016
How to Re-Flash or Software Update NOVO7 Tech Phones [Firmware Download Link And Software]
Step 1. Download the MTK USB Drivers :
Step 2. Download the file SP_flashtools from this link: http://novo7tech.com/download-firmware/SP_Flash_Tool_v5.1352.01.rar
Step 3. Download the Firmware or the software needed for your mobile phone from this link: http://novo7tech.com/firmware/
Note: The model of your Phone example: THL T100S
Step 4. Extract all the files into each separate folders.
Example:
Note: Make sure that you have created your folder to locate your file
Step 5. After the files have been extracted, open the “SP Flash Tool v5.1352.01” folder and look for the green logo icon named “flash_tool.exe”
Step 6. Flashtool Configuration:

6.1 Scatter and loading consist of text file from the folder of your firmware.
Like this:

6.2 Select download Mode “Firmware upgrade”
like this:

5.3 Starting the flasher click “Download”
like this:

Note: This image shows after you have click the download icon.
Step 6. Plug-in your device:
Note: There are two options software upgrade: with or without Battery just plug-in the USB cable into PC and connect to your mobile device and after awhile It will start flashing your device and wait until finish. The Green Circle will appear meaning “Job Done”.
Have Any Questions?Use Comment Below!
Posted by
komon
Subscribe to:
Posts (Atom)